Wednesday, January 12, 2011

Pie on August~

As for the August month, I kind of did the same thing with the July's one. Editing the pictures first before putting them in the calendar.

Here's the process of it,


First I opened the picture in Adobe Photoshop to edit it.

Next, I use the Quick Selection Tool and go to Filter> Blur> Blur more.

Then I adjusted the brightness of the picture as well with the above setting.


I then did some editing with the color balance as well.

After editing the picture, I then put it into the calendar format we've designed.


I then added a little effect for the picture by right-clicking the picture layer and clicking Blending option.

We chose to put Bevel and Emboss so here is the setting for it.


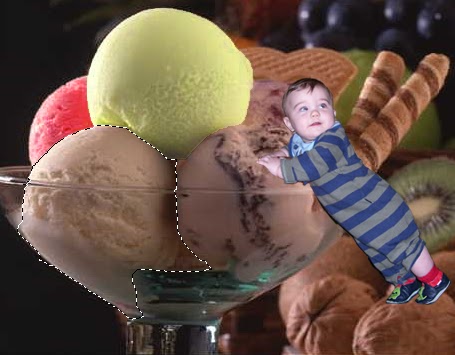
Like the previous post I stated, the other 2 of the pictures were also edited a bit similar and is then put into the calendar as well.

Here is the final outcome of the August month calendar. :]


The final outcome of the August month Calendar.

June calendar

Below are the calendar that i have done which is ICE CREAM. =]


Process of editing>>>


Step 1 : Open the image that you have choose.

Step 2 : Usually small kids love eating ice cream so it gives me the idea for adding a small kids into the image. Go to FILE > PLACE.


Step 3 : Select ERASER TOOL and start erasing the extra part.

Step 4 : The image that you have done erasing.


Step 5 : Next, i use QUICK SELECTION TOOL and select the top of the ice cream.


Step 6 : Choose REPLACE COLOUR and pick the colour you wish to change.


Step 7 : The colour of the ice cream have been changed. =]


Step 8 : Repeat for each and every picture and you will get all this.


Step 9 : Next, I will change the background colour. Choose SOLID COLOUR and pick the colour that I want.


Step 10 : The image will looks like this.


Step 11 : Then, I decided to add a LIGHTING EFFECTS to make it more attractive.


Step 12 : It have become more delicious and interesting. =]


Step 13 : This is the image that I have used the BURN TOOL to some part of my image so that it will be more realistic.


Step 14 : Other than that, I decided to add some shadow into the small kids. So, i use DROP SHADOW.


Step 15 : This is the final look of the image. =]


Step 16 : Place the image that have done edited into the layout.


Step 17 : Then, place the calendar that have been done on AI.


Step 18 : Now, choose the BEVEL AND EMBOSS.


Step 19 : Repeat for each and every picture.


Here is the final looks of JUNE calendar. =]

July Cookie Monster~

As I am assigned to do the July and August month calendar, here is how the process of me doing the July's one....

First of all, I edited the picture I have chosen to put on the calendar.

First I clicked Image> Adjustment> Brightness/Contrast.


Then, I went to Image>Adjustment>Color balance and changed a bit of the color setting to make the cookies look more mouth-watering to our eyes.


After finish editing the picture, I placed it into our calendar format.


Since we decided to put 3 pictures in our calendar, the other 2 pictures was also edited the same and is then put into the calendar as well.

This is the final out look for the July's month calendar. :]

The final outcome of the July's month calendar.

October Calendar

Chocolate Foutain is the theme of October.

Below of the calendar is what I have done for October.


Now, I will show the process of editing the image.

1. I open my image from my desktop.


2. Use Curve Tool on my image.


3. Quick Selection Tool to select my image, go to Filter, Blur, Gaussian Blur.


4. Go to Filter, Render, Lens Flare.


5. Use Levels Tool on my image.


6. Use Crop Tool to crop the hand on the image.


7. Place the image to my calendar layout.


8. Put Bevel and Emboss on the image.


The editng process of the other 2images also same as this image.

Final look of October calendar >>>>>>>