Showing posts with label alice low. Show all posts

Wednesday, January 12, 2011

June calendar

Below are the calendar that i have done which is ICE CREAM. =]


Process of editing>>>


Step 1 : Open the image that you have choose.

Step 2 : Usually small kids love eating ice cream so it gives me the idea for adding a small kids into the image. Go to FILE > PLACE.
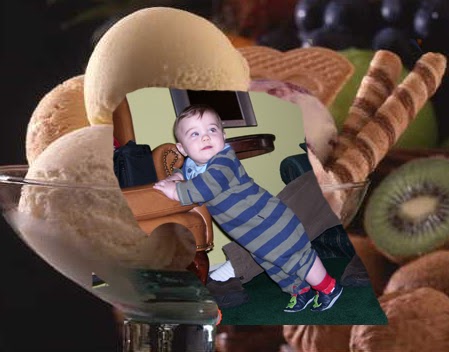

Step 3 : Select ERASER TOOL and start erasing the extra part.

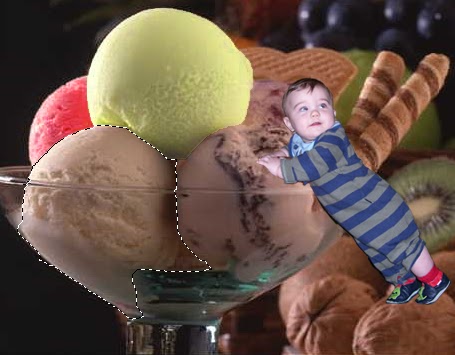
Step 4 : The image that you have done erasing.


Step 5 : Next, i use QUICK SELECTION TOOL and select the top of the ice cream.


Step 6 : Choose REPLACE COLOUR and pick the colour you wish to change.


Step 7 : The colour of the ice cream have been changed. =]


Step 8 : Repeat for each and every picture and you will get all this.


Step 9 : Next, I will change the background colour. Choose SOLID COLOUR and pick the colour that I want.


Step 10 : The image will looks like this.


Step 11 : Then, I decided to add a LIGHTING EFFECTS to make it more attractive.


Step 12 : It have become more delicious and interesting. =]


Step 13 : This is the image that I have used the BURN TOOL to some part of my image so that it will be more realistic.


Step 14 : Other than that, I decided to add some shadow into the small kids. So, i use DROP SHADOW.


Step 15 : This is the final look of the image. =]


Step 16 : Place the image that have done edited into the layout.


Step 17 : Then, place the calendar that have been done on AI.


Step 18 : Now, choose the BEVEL AND EMBOSS.


Step 19 : Repeat for each and every picture.


Here is the final looks of JUNE calendar. =]
May calendar

I'm in charge on MAY and JUNE calendar.
My subject for my part of calendar will be CREAM PUFF for May and ICE CREAM for June. =]
Below are the first calendar that i have done which is CREAM PUFF.


Now I'm going to show you the process.

Step 1 : Open the image that you have choose.


Step 2 : To make my image look more interesting, i decided to add another image into it. Go to FILE > PLACE.


Step 3 : Choose the ERASER TOOL.


Step 4 : Start erasing the extra part.


Step 5 : This is the image that you have done erasing.


Step 6 : I'm going to put the image on the bottom right so I have to FLIP HORIZONTAL.

Step 7 : Move the image to the bottom right.


Step 8 : The image will be like this. However, it looks abit weird.

 
Step 9 : So, I choose to use DROP SHADOW.


Step 10 : Finally, my image look more realistic with the shadow. =]


Step 11 : Next, i use QUICK SELECTION TOOL and select the top of the image.


Step 12 : Choose the GAUSSIAN BLUR and i used 5.0 pixels.


Step 13 : It will looks like this.


Step 14 : Then, i decided to changed the colour of the plate. I used QUICK SELECTION TOOL to select it.


Step 15 : Choose REPLACE COLOUR and pick the colour you wish to change.


Step 16 : This is the colour that I have chosen.


Step 17 : The colour of the plate have been changed. =]


Step 18 : Now, I will change the background colour. Choose SOLID COLOUR.


Step 19 : This is the colour that I have picked.


Step 20 : This is the final look of the image. =]


 Step 21 : This is the look of our calendar layout.


Step 22 : Place the image that have done edited into the layout.


Step 23 : Then, place the calendar that have been done on AI.


Step 24 : Now, choose the BEVEL AND EMBOSS.


Step 25 : The colour that have been choose.


Step 26 : Repeat for each and every picture.


Here is the final looks of MAY calendar. =]