Picture 1
 |
| original http://www.flickr.com/photos/abillionsmiles/4825955967/ |
 |
| final |
 |
| 1. file > open , choose the file |
 |
| 2. right click on the layer > choose duplicate layer > rename layer (sharpen tool ) > select sharpen tool ( to sharpen the creme brulee to make it looks clearer ) |
 |
| 3. duplicate layer > rename layer ( Gaussian blur ) > select magnetic lasso tool |
 |
| 4. use magnetic lasso tool to select the background ( a selection appear ) |
 |
| 5. select > modify > feather |
 |
| 6. feather radius ( 5 pixels ) |
 |
| 7. filter > blur > gaussian blur ( to make the background blur ) |
 |
| 8. radius 6.0 pixels |
 |
| 9. adjustments > brightness/contrast > brightness 0 , contrast 30 ( to enhance the colour of the picture ) |
 |
| 10. duplicate layer > rename layer ( burn tool ) > select burn tool > opacity 50 % > range ( midtones) ( burn the dark area of the cream which in the red circle to make it more darker ) |
 |
| 11. duplicate layer > rename layer ( dodge tool ) > select dodge tool > opacity 34% > range (highlights) ( apply it on the cream which in the red circle to highlight the cream ) |
 |
| 12. duplicate layer > rename layer ( gradient tool ) > select gradient tool > foreground colour ( black ) > press shift ( to make a straight line) + drag it on the background so the creme brulee will be the main focus |
 |
| 13. file > place the bokeh picture at the top left position > blend mode ( vivid light ) > opacity 100% , fill 62% ( to add texture on the background ) bokeh picture > http://desktop-world.info/2009/05/bokeh/ |
 |
| 14. layer > layer mask > hide all |
 |
| 15. select dodge tool > apply it on the position which the bokeh picture is placed until the texture appear ( to make sure only the wanted part is shown ) |
 |
| 16. file > place the bokeh texture at top right position > edit > transform > flip horizontal > repeat the steps 14 & 15 |
 |
| 17. filter > render > lens flare > adjust the flare center > brightness 120% > lens type 50-300mm |
 |
| 18. file > place > white dotted picture > place at left side > blend mode (overlay) ( add effect to avoid the dark area looks dull ) white dotted picture > http://wanderingsoul-stox.deviantart.com/art/Texture-102-99823991?q=&qo= |
 |
| 19. right click on the layer > select rasterize layer |
 |
| 20. select eraser tool > erase the edges of the picture which in the red circle |
Picture 2
 |
| original http://www.flickr.com/photos/sutanto/3615951464/ |
 |
| 1. select curves > drag it to adjust |
 |
| 2. select color balance > tones ( midtones ) > cyan-red (+96) , magenta-green (+33) , yellow-blue (-3) |
 |
| 3. select channel mixer > output ( cyan ) > cyan (+35), magenta (-30) , yellow (+1) , black (0) , constant (0) |
 |
| original |
 |
| final |
 |
| 1. select levels > mid tone 1.00 , highlights 193 |
 |
| 2. select hue/ saturatihue -1 , saturation + 27 , lightness +1 |
 |
| 3. select colour balance > tone(midtones) > cyan- red +96 , magenta-green +33 , yellow- blue -3 |
------------------------------------------------------------------------------------
 |
| 1. after finish editing those pictures , I drag all the pictures into the layout and place it correctly . Those pictures are not absolutely fixed the size , so I use rectangular marquee tool to make a selection > edit > cut ( cut the extra edges) |
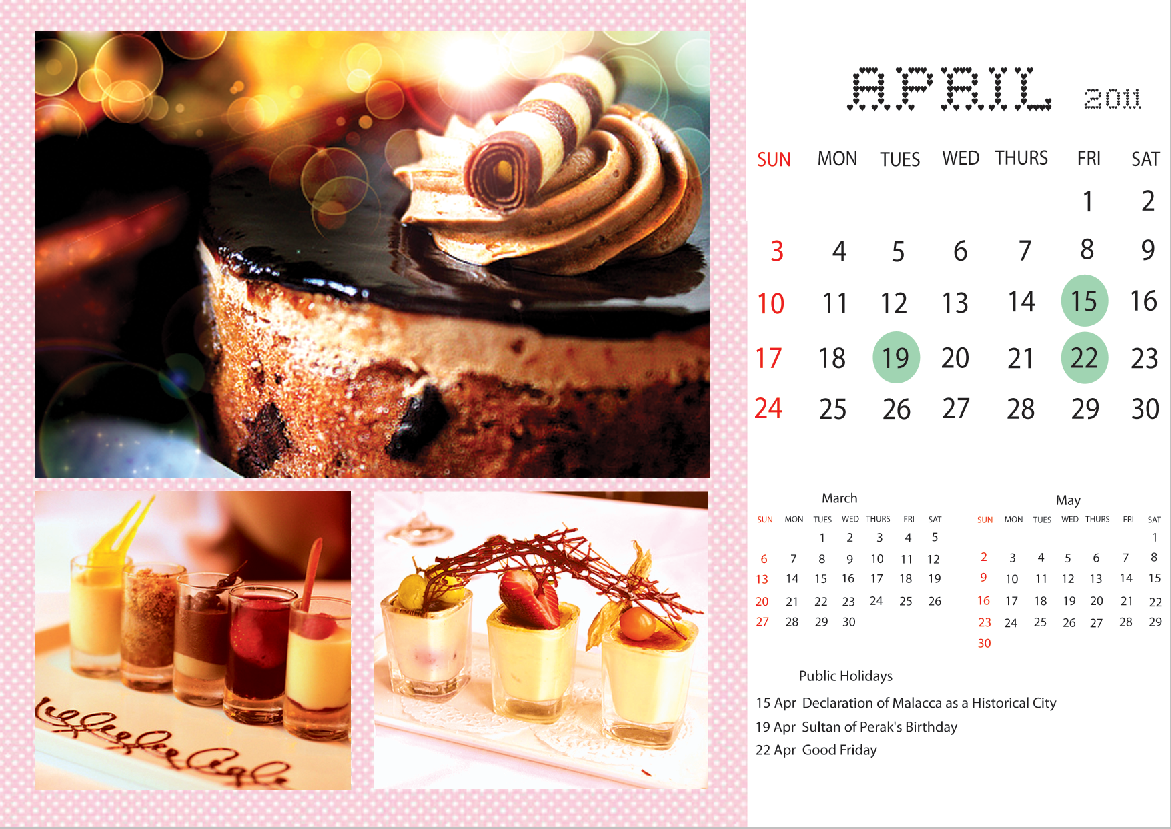 |
| 2. then I drag the calender which I make it from illustrator into photoshop and arrange it nicely . |
 |
| 3 . three of these pictures : right click on the layer > blending options > style (inner bevel) > technique (smooth) >depth ( 330 %) > size 40px > angle 120 > altitude 30 > highlight mode (screen),opacity 55% > shadow mode (multiply) , opacity 55% , apply it to all of those pictures. |
 |
| FINAL |


